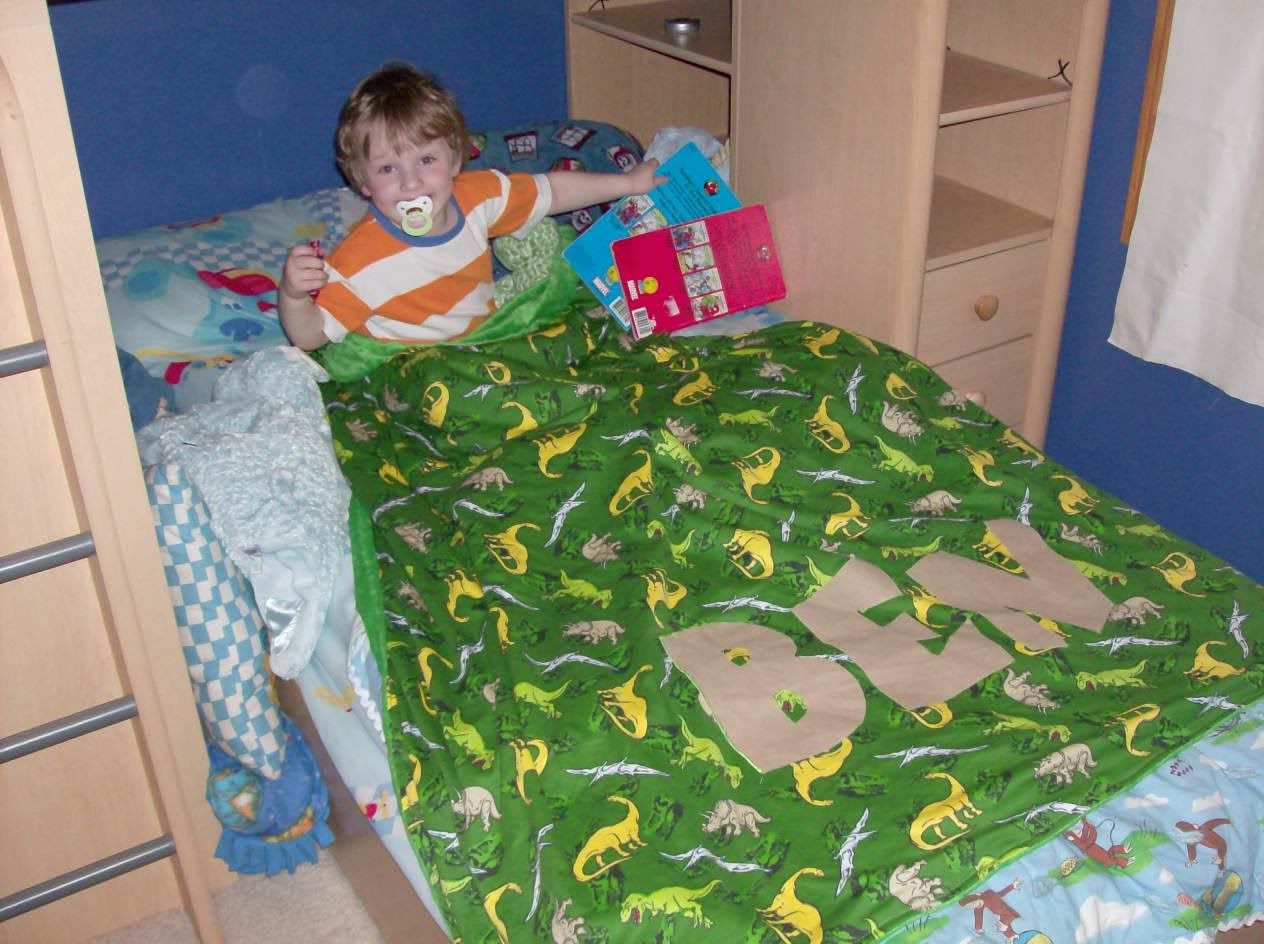
I posted earlier about Ben wanting specific fabric at Joann’s…well, here is what we did with our two yards of each fabric: dinosaurs on one side – green Minky fabric on the other. The blanket was super easy to do – finished in one afternoon – but it took longer than it should have (doesn’t it always?) because the heat-n-bond I used to put the B-E-N letters on gummed up my needle and kept breaking the green Sulky thread. If anybody knows how to do a satin stitch so this won’t happen, please, please let me know!

Step 1: Lay fabric out with right sides together. Cut to the dimensions you want (I could use tips on accurately cutting large rectangles!).
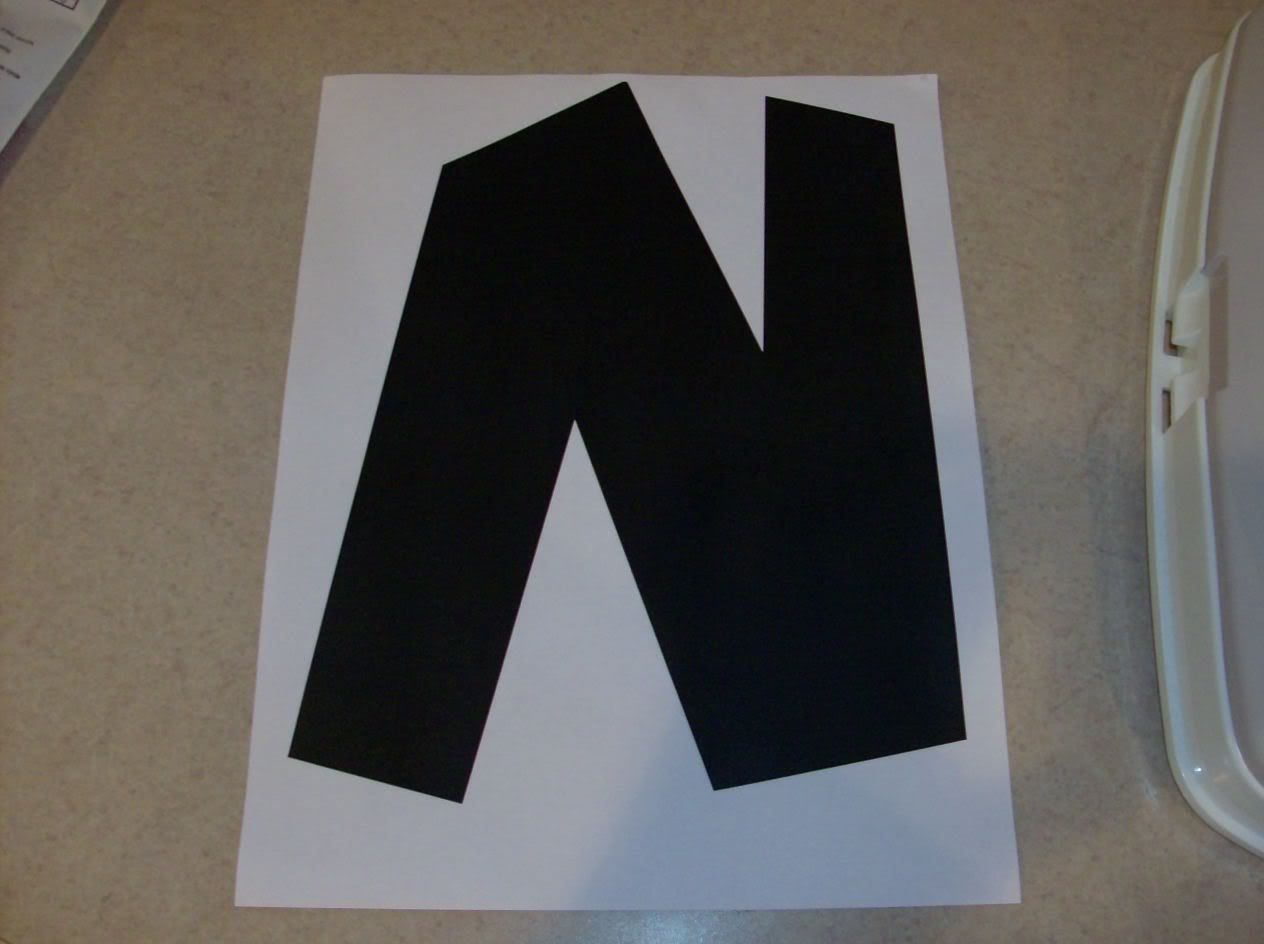
Step 2: Print out the letters you want in the font of your choice – thicker is better and easier to sew regardless of what your stitch will be (best are zig zag or satin stitch).
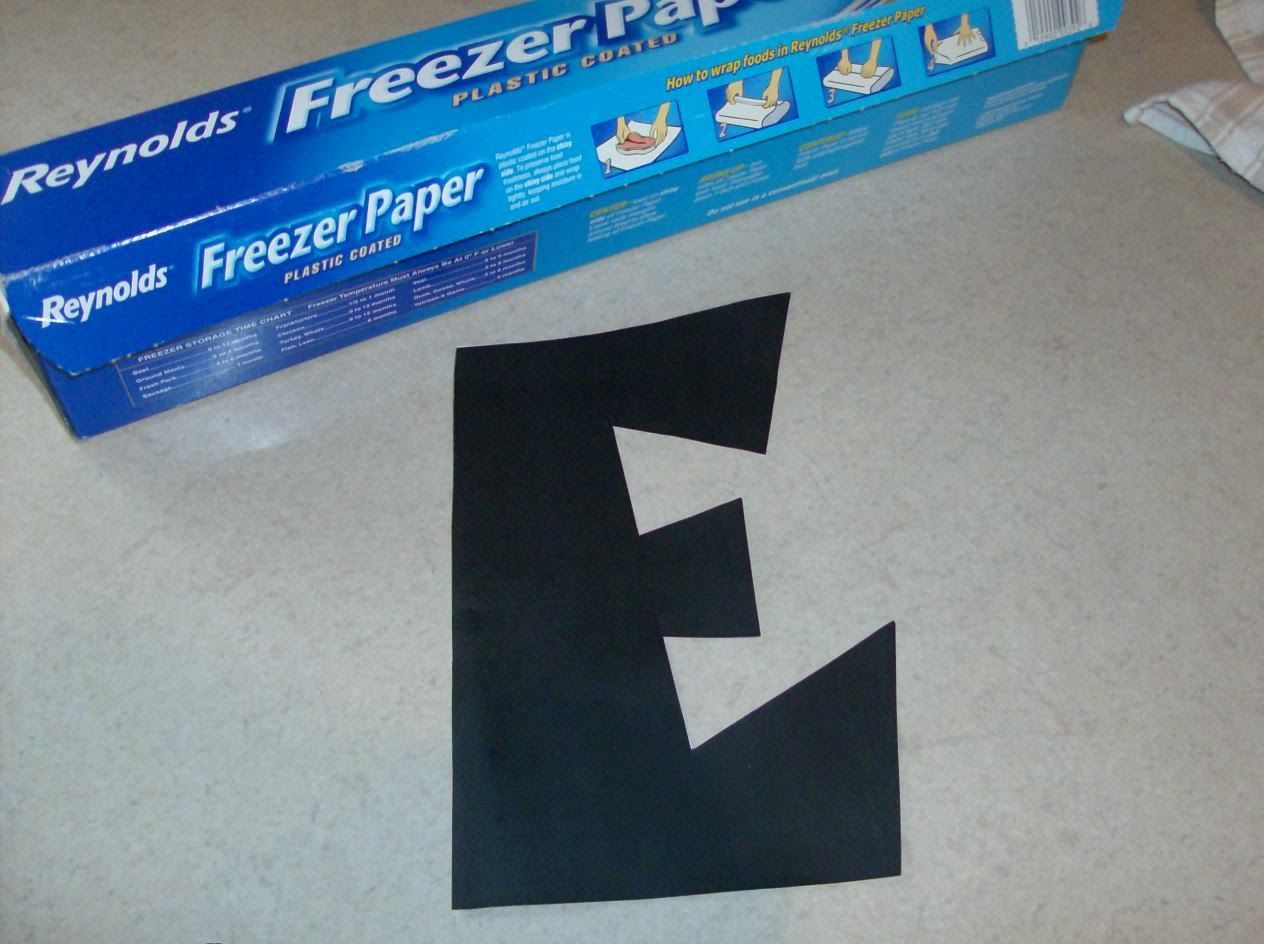
Step 3: Cut out the letter and either trace it onto freezer paper or staple it to freezer paper and cut out the same shape out of the freezer paper. Create the letter so the waxy side is on the back.
Step 4: Iron the freezer paper, waxy side down, onto the fabric you want to create the letters – mine was brown. Cut out carefully with as smooth of edges as possible. After they’re cut, you can remove the freezer paper if you’d like to.
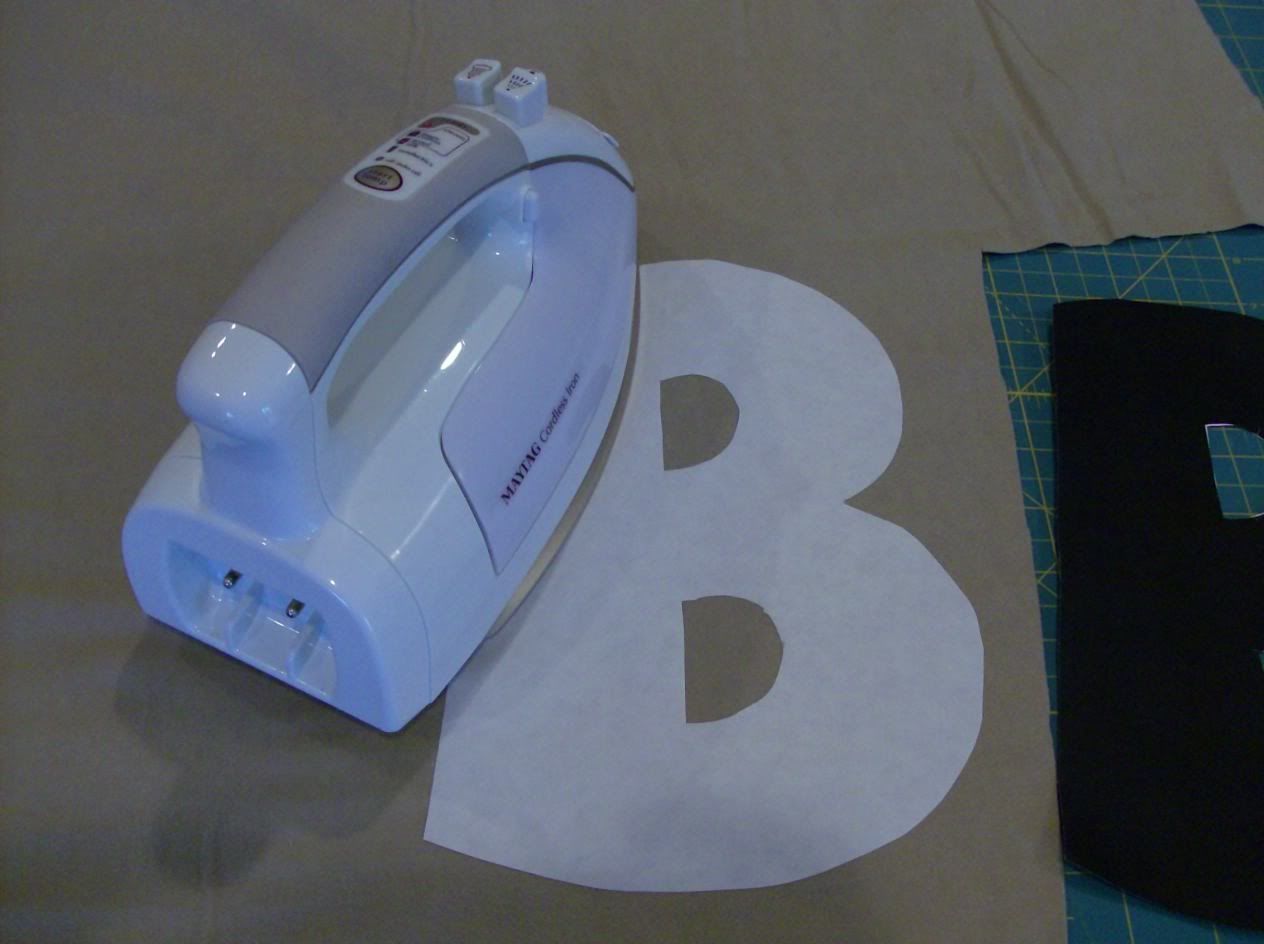
Step 5: Adhere heat-n-bond to the BACK side of the letters as per the directions on your product. I would highly recommend using a lighter version than the ultra heat-n-bond that I used because when satin stitching it created enough heat to gum up my needle and keep breaking the Sulky thread I was using so for the three large letters I had I had to clean the needle and rethread about twenty times! I, myself, will not be using a wonder-under type thing again but pin my letters in place securely and just sew them on that way. Tip: I ironed one letter on at a time while the others were pinned to the fabric so I would have a visual guide as to where each letter should be juxtaposed with the other two.
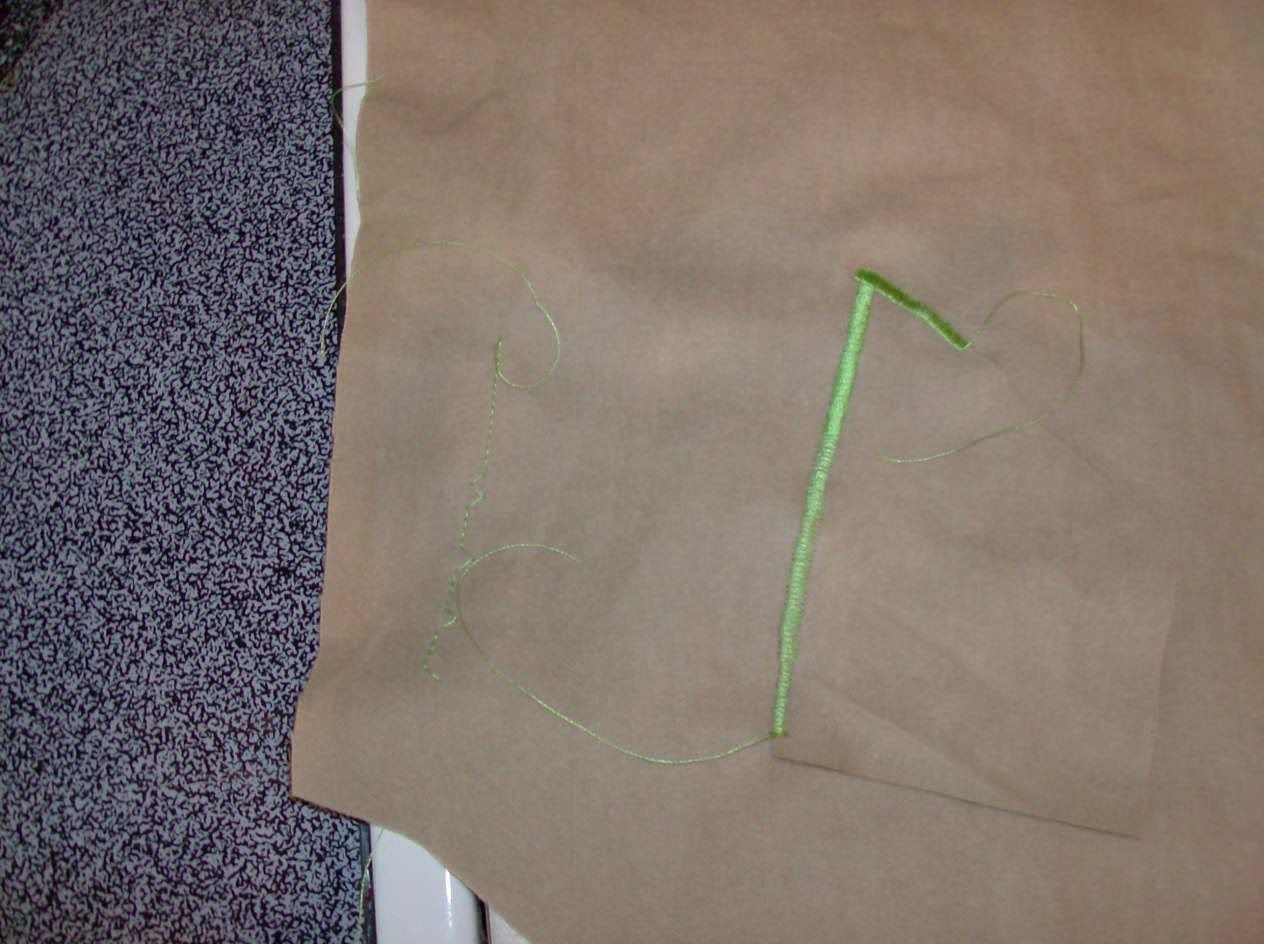
Step 6: I started out satin stitching but ended up having to zig zag because of the gummy needle situation (see above). To make a satin stitch with your machine, just widen your stitch width and shorten the stitch length to 1 or so (you can test this out and create a satin stitch to your liking).
Step 7: Return blanket top to match up – right sides together – with the minky bottom and sew all around the edges using about a half of an inch seam. I used a dinner plate to round the edges of mine – easier for kids to make their own beds with that shape of blanket! Then I sewed all around, leaving a 4″ to 5″ opening to turn the blanket inside out.
Step 8: Topstitch all around the edge as close to the edge as you can get while fingerpressing the opening and stitching it closed. Then, sew around the blanket again about a half of an inch inside the edge to give it a finished look. All done! Easy as pie. Definitely a favorite utilitarian blanket around here – and it looks so cute in Ben’s room.
Please, please if you know of a faster, easier or better way to do any part of this project, please let me know!