What I Designed Today: Custom Penzey’s Spice Jar Labels

My trip to Omaha over Spring Break was very fun — and very exhausting.  Now I’m back home in Bartlesville and there’s a zillion things I should be doing right now OTHER than making custom spice jar labels.  But I went to Penzey’s.  And I bought these cute jars with yummy spices (e.g., celery salt that actually smells like celery and salt).  It makes complete sense, right??  Right!  It just makes me feel better.  I’m attaching links to the file as a pdf and png, shown below, but if you’d like the original Illustrator CS5 file, just shoot me an email (the fonts used are Alex Brush and Zebrawood).  The PDF could also be edited in Adobe Acrobat. I hope it makes you “feel better” too.  Priorities, people.

PDF DOWNLOAD:  penzeysspicelabels

This pdf file is set up for HP Restickables (a sticker I highly recommend that is more like a post-it note that you can remove and reposition many times) – it’s from a really old stash and I don’t think anyone sells them anymore, but any basic sticker stock would do!  I manually cut out the labels.  Yes, I’m insane.  Who has time to do such a thing?  Certainly not me.  But I did cut them out, one by one, and it totally relaxed me.  The outline isn’t perfect but I’m seriously happy with them anyway.

spicejarfreetemplateDSC_0351penzeysspicelabels

Addicted to Pinterest

It’s almost better than reading books and much more instantly gratifying:  Pinterest.  I love this site.  It’s the new method of flipping through magazines for ideas and putting them all in one place:  quotes, decor, motivation, design ideas, garden ideas, etc.  Now if I could only get OFF pinterest and start working on my own abode…I’m still planning, okay?! This is everything I love all mixed in one.

Christmas Dinosaurs & Homemade Kool-Aid Play Dough

DSC_0001

I heart homemade playdough. Ben had gotten new Play-Dough of the store variety for Christmas but since we shipped the stuff from Omaha, and it has not yet arrived, I resorted to a tried and true kool-aid play dough recipe that is easy, cheap, and fantastic.

Kool-Aid Play Dough Recipe

2 1/2 cups all purpose flour
1/2 cup salt
3 T oil
2 packets of kool aid powder (we used another brand)
glitter – optional
additional coloring such as Wilton’s – optional

Mix dry ingredients with a whisk. Add oil and blend. Pour 2 cups boiling water over all and mix. After it’s cooled, the child can help mix the dough. I mix it and then spread it out on our metal top table and finish mixing it so it cools faster.

Enjoy! I love how Ben always makes his a dinosaur land. He simply can’t conceive of anything else he’s so into dinosaurs.

Yummy & Soft – Pumpkin Cranberry Cookies

I made these cookies last year and found this old post. I am so thankful I found it because a) I loved the recipe and forgot where it was and b) I wanted to share it even without a good picture of the cookies!

I am NOT usually a cookie freak, since I just made a triple batch of chocolate chip cookies just last week, but I had some whole frozen cranberries to use up and my mother claims to not like chocolate (really, I met another person who doesn’t like chocolate this week – where are you people coming from?!). I wanted to make a cookie my Mom would like since they are coming over for dinner today {sigh: this year my mother is 1,000 miles away}. These are a great alternative to the popular pumpkin chocolate chip cookie. I like the tart cranberries in there! Give it a try – the recipe is from my tried-and-true vegetable and harvest cookbook called The Victory Garden Cookbook by Marian Morash. We have never had a bad recipe from the cookbook.

Pumpkin Cranberry Cookies

1 cup sugar
1 tsp vanilla extract
1 egg
1 c. pureed cooked pumpkin
2 1/4 c flour
2 tsp baking powder
1 tsp baking soda
1/2 tsp salt
1 tsp cinnamon
1 cup cranberries
1 T grated orange peel
1/2 cup chopped nuts

Cream butter and sugar until light and fluffy. Beat in vanilla, egg, and pumpkin. Sift together flour, baking powder, baking soda, salt and cinnamon; beat into pumpkin mixture. Halve cranberries (I left ’em whole and they worked out fine!) and stir into mixture along with orange peel and nuts (again, left those out, more kid friendly). Drop by rounded teaspoonfuls onto a greased cookie sheet. Bake in a preheated 375° F oven for 10 to 12 minutes. Makes approximately 36 cookies. Again: I left out the orange peel and nuts and these were still very delicious!

One Serving Chocolate Cake in 2 Minutes!

Eggland’s best published this one cup chocolate cake recipe in a magazine I was reading the other night. By the time we were done making individual cakes (because everybody wanted one), I could have made a whole cake. Having said that, though, this was really yummy and way more fun. Give it a try! It came right out of the mug! Chocolate cake in 2 minutes. Wow. You can click on the picture for the recipe.

Link Love & Giveaways for a Rainy Wednesday

It’s a wonderfully rainy day in Houston today and I have lots on my plate. Mainly getting my office straightened up – still – so I thought I’d just share with you some wonderful links including great ideas and giveaways. Hope you enjoy them! They’re from some of my favorite sites to visit when the need for inspiration strikes.

Grosgrain Fabulous always offers the most beautiful creations. Now she’s offering a poppy boutonniere, but even if you don’t win, there’s always the tutorial on how to make the beautiful things. Click on her link and be sure to check out the blue one attached to the pillow – gorgeous!

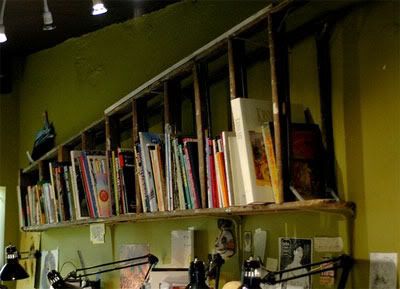
Dudecraft made a bookshelf from an old ladder – I don’t know how practical this would be with children shaking walls and all but it looks fantastic, doesn’t it? And oh so clever. I love repurposed things.

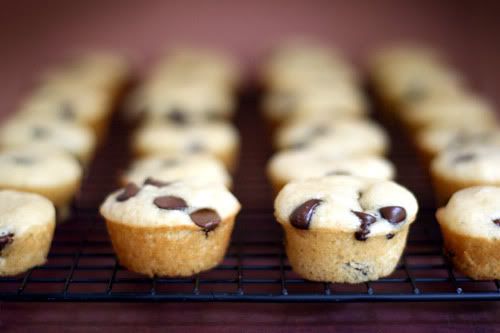
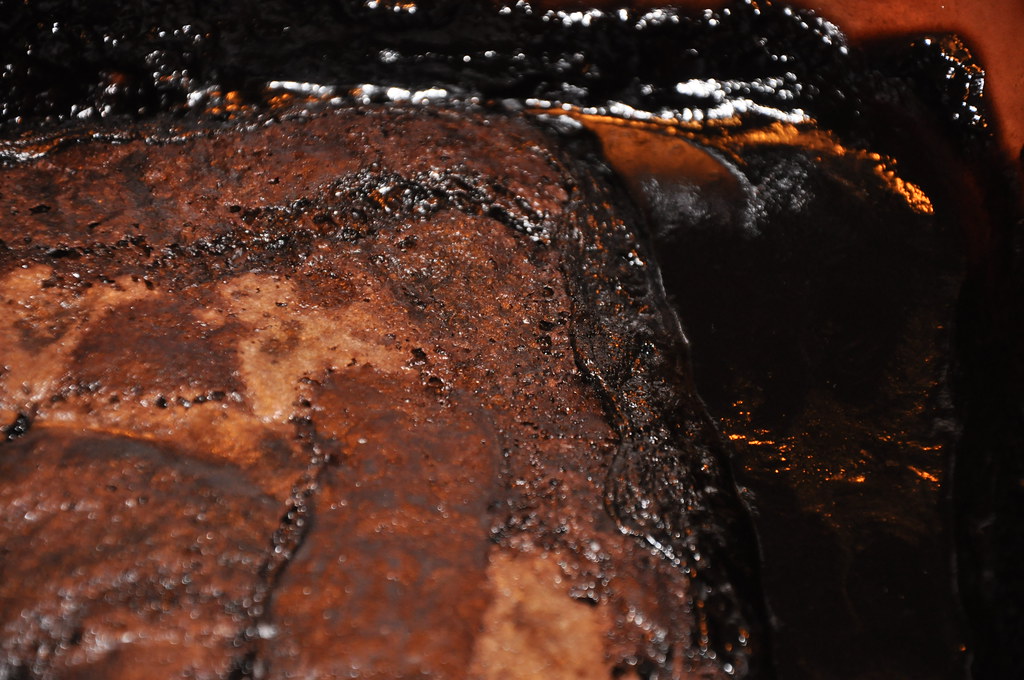
So I’ve been searching for what to put in my kids’ lunch boxes other than the usual fare and I ran across this idea from Bakerella (isn’t that site wonderful?!): pancake muffins. With chocolate chips. Sounds like something my kids would eat and it’s not quite as sinful as a full-on brownie for lunch. Sometimes you do whatever you can to get calories in a child or they would not eat at all.


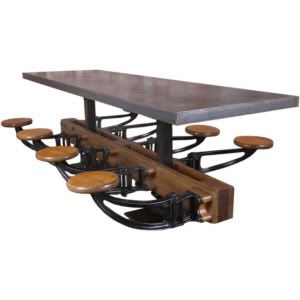
If you have thousands of extra dollars, be sure to check out Get Back‘s website full of beautiful vintage chairs, tables, you-name-it. It’s a fun reminiscent kind of thing and the restoration of the items has been just lovely. It would be kind of nice to step back in time…but we probably wouldn’t appreciate it like we don’t appreciate our current design trends. Anyway – it is surely fun to look around the site!

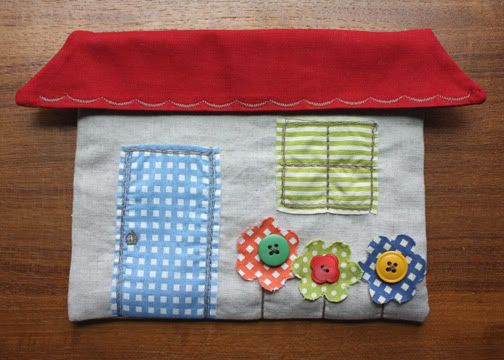
The Long Thread has this adorable little house pouch. I just love this cute design.

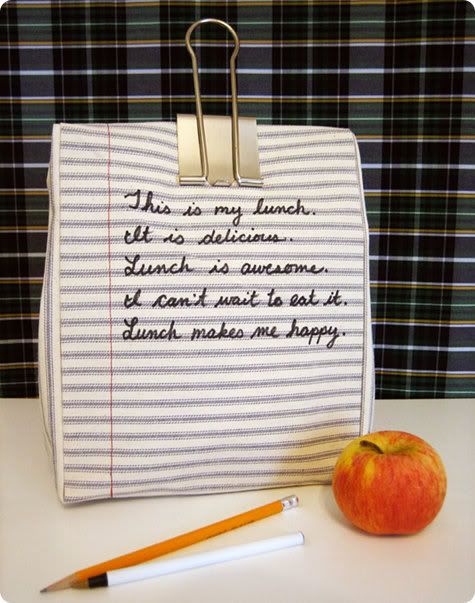
Design Sponge has the cutest lunchbox creation. And it actually looks like something I could do! But I’m not sure if it’s something any of my B-O-Y-S would carry to school or use. Maybe if I made a camo lunch box out of other repurposed fabric. But I do love this notebook version.

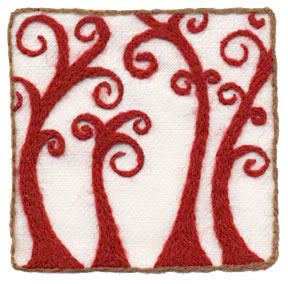
Wool & Hoop make the cutest crewel-work kits. The only crewel thing about it (ha! I crack myself up!) is that I don’t do crewel work. But the work is just gorgeous, no?

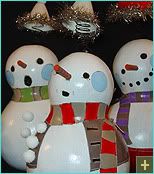
Artist Jeni B. Gochnour makes adorable festive fall and Christmas holiday items, doesn’t she? What great faces these characters have!

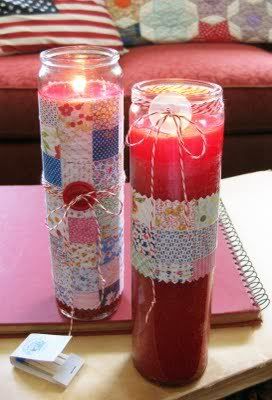
Cathe Holden of Something I Just Made created these items from pictures of a cherished quilt. What a great way to remember the quilt in a more permanent fashion.

There. I think that’s enough browsing for today. Hope you enjoyed some of the links!

Farm Girl Barter Website

I do love this magazine out of Idaho…Mary Jane’s Farm. She has a new addition to her extensive website where people can barter for really great things! Check out Farm Girl Barter and you’re sure to find something you would like to have or use it to simplify and clear your own {precious} clutter!

Paula Deen’s Beef Macaroni Recipe

Don cooked dinner a few nights ago and used this recipe from Paula Deen. The kids ate it up! We actually saved money by using organic beef from Costco – we were able to use one pound instead of two (no shrinking with good beef!) – I highly recommend both the recipe and the meat.

1 teaspoon each dried basil, cumin, and dried oregano
Salt and pepper
3 cup canned crushed tomatoes
2 lb lean ground beef
1 tablespoon chopped garlic
2 cup chopped onion
2 cup chopped green bell pepper
2 tablespoon vegetable oil
1 lb box elbow macaroni
2-3 cup grated cheddar cheese

Cook the macaroni according to package directions; drain and set aside. Heat the oil in a skillet; add the peppers, onion, and garlic, and saute until soft. Add the ground beef and saute until browned. Add the tomatoes, salt and pepper to taste, and the basil, cumin, and oregano. In a large bowl, combine the macaroni and the beef mixture. Spread this mixture into a 9 x 13-inch baking dish. Top with the cheese and bake at 350 degrees for 20 to 25 minutes, or until the cheese is lightly browned and bubbly.

Cook’s Note: Ground turkey or chicken can be used in place of beef, if desired.

Yield: 8-10 servings
Prep time: 8 minutes
Cook time: 25-30 minutes
Ease of preparation: easy

Hot Fudge Pudding Cake

Adapted from Beverly Nye’s recipe entitled Down-In-The-Dumps Pudding from “A Family Raised On Sunshine”.

This is one heck of a cake. It’s more of a brownie with molten hot fudge bubbling below the surface! It is perfect for ice cream and – the next day – is great right out of the pan with a spoon (would I do that? oh yes!).

Beat together:
2 cups flour
1 1/2 cups sugar
4 tsp baking powder
1/2 tsp salt
generous 6T cocoa

Stir in:
1 cup milk
4 T vegetable oil

Spread mixture in an ungreased 9 x 13 pan.

Blend in a small bowl: 2 cups brown sugar, 1/2 cup cocoa. Sprinkle over top of batter.

Pour over all: 3 cups hot water. Bake at 350° F for 45 minutes.

Crafting Green: Brown Paper Recipe Cards

From Crafting A Green World, written by Jackie Hernandez. Brilliant. I never remember to take the bags back to Whole Foods, anyway, and this is a great way to use them up and makes adorable recipe cards! Follow the tutorial here.

Cute Candy Buttons from Bake It Pretty

I can vaguely remember having the time to create such cute things! Check out the Bake It Pretty site here and blog here. Frankly, I’m still making more time for exercise. And it’s difficult to fit in! If I make time to make treats, I’ll just have to make time for more exercise. It’s a vicious cycle.

Homemade Laundry Soap – from Diana McInelly

Thanks, Diana, for scouting this out. What a great idea. This could only come from a friend who has more boys than I do!!! Click on her boys’ pic above to see her blog.

Homemade Laundry Soap

– 1 bar of soap (I bought Ivory but most recipes call for a soap called Zote, I haven’t seen it but they say it is at wal-mart and in all fairness I didn’t look)
– 20 mule Borax
– Arm and Hammer WASHING soda

1. Shave the soap and add to 6 cups of slow boiling water and stir until dissolved.

2. Add to the water 1 cup of Borax and 1 cup of Washing soda. Now different recipes say different things some do 1/2 cup and others do 1 1/2 cup so I just did 1 you can play around with it.

3. After it all dissolves add 4 cups of HOT water to the bucket that you will be holding the soap in. I bought a plastic container that will hold 32 cups of water cause that is how much you will have when its all done. And it came with a hinged lid on it.

4. Pour the soap mixture to the hot water and stir

5. Now finish by adding 22 cups of water to the mixture.

6. Stir and let sit for about 24 hours

It will be a gel mixture but everyone says that the mixture will separate so you just have to stir it before you scoop it.

Scoop 1/2 cup to your laundry!

Online Giveaway – Mary Engelbreit Cookbook!

I was waxing a bit philosophical late yesterday so, let’s have a little fun! After all, Thanksgiving is just around the corner and you might need a good cookbook. What is it about cookbooks? I love them all. I have an entire chicken-coop-turned-cabinet in my kitchen full of ’em. That is why I’m parting with this one as an online giveaway; it’s a great cookbook, I just have not had a chance to try any of the recipes and I thought someone else might really enjoy this just in time for Turkey Day (aka Thanksgiving)! This is Mary’s “Queen of the Kitchen” Cookbook and it includes biscuits, wafers, chowder, ribs, lamb, turkey, shrimp, waffles, pineapple cake. The pies alone include: Brown Sugar Pumpkin Pie, Farmhouse Walnut Pie, Apple Cinnamon Crumb Pie, Strawberry & Lemon Tart, Deep Dish Apple Cranberry Pie, Nectarine & Blueberry Cobbler, Caramel Baked Pears and Double Pear Crisp. Ooooh, there’s Peanut Brittle Fudge Sundae…oh, crud, did I really want to part with this one??? It’s up for grabs! Rules: One entry per email/person, just make a comment on THIS post. Winner will be chosen by random.org in two weeks. Last day to enter will be midnight on Wednesday, November 19th. Value of this giveaway is approximately $19.95.

Nana’s Chicken & Gummy Noodle Soup

Yummy gummy homemade noodles. My mother makes the best homemade chicken noodle soup EVER. Thick, gummy noodles that my kids adore. They hadn’t eaten one of my meals in weeks and they gobbled this up declaring I was the best cook in the whole world. Cheap, easy, delicious. Hope you enjoy the recipe.

Nana’s Homemade Chicken & Gummy Noodle Soup:

Bring chicken parts (best with skin and bone) with one chopped onion and an optional clove of garlic (use whatever chicken you’ve got on hand and as much as you want) to boil in a large stock pot of water. Drain chicken, straining and keeping strained broth. Cool chicken in fridge until you’re ready to pull off the meat. For noodles: Beat 6 eggs (you can use the whole egg – we’re not fussy here) with flour adding one cup at a time until it becomes a very soft dough consistency. Being very generous with flour, roll out onto the counter into a rectangle shape. Roll up with lots of flour and cut into discs that will unroll as noodles (the dough will stick to itself if you didn’t use enough flour!). Seriously, be generous with the flour. Let the dough strips stay on your counter for about 3 hours or until you’re ready to make the soup. While you’re doing that, you can pick the meat off the chicken bones, ready to add back to the soup later.

About 20 minutes before you’d like to eat, bring the broth to a boil – add a little bouillon for flavor – if you want sliced carrots, add them now. Add the noodles, a few at a time, with extra flour on them, to the broth and stir occasionally as you add them so they don’t stick. Noodles will cook in about 20 minutes. Adjust heat as needed. The extra flour on the noodles thickens the broth. Return chicken to soup and heat through. Salt and pepper to taste and enjoy!

My Mummy Halloween Ideas

Okay – I couldn’t find my mummy cupcakes (they were like Kara’s except the lines were mostly horizontal only having chocolate cupcake underneath and leaving a swath where the eyes would be so you could just peek at the cupcake and then having red dots for the eyes). They were cute but I have no witnesses – sorry!


I did find an old mummy cheese log surrounded by crackers that I had made for a church event. You can make any recipe cheese log you’d like. Pre-made and purchased worked great for me. Just make a savory cream cheese based dip, fill your piping tube and mummify the orange cheese. Olives for “eyes” and other veggie accoutrements work great, too. Use your imagination!


One of my favorite magazines for a Mom with and a home based business is Working Mother. I no longer subscribe but they have the best time-saving tips, recipes, etc. I think every Mom should read it – just to save time (isn’t every mother strapped for time?). I don’t think I got this costume idea from there, but…one of the easiest, cheapest and cutest costume ideas I’ve ever seen was this mummy – this was Jack in 2006. So very scary. Ah, the memories…they are growing too quickly for sure!