My Mummy Halloween Ideas

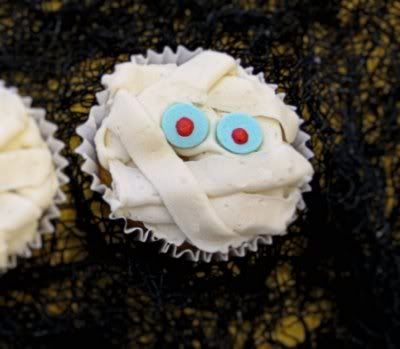
Okay – I couldn’t find my mummy cupcakes (they were like Kara’s except the lines were mostly horizontal only having chocolate cupcake underneath and leaving a swath where the eyes would be so you could just peek at the cupcake and then having red dots for the eyes). They were cute but I have no witnesses – sorry!


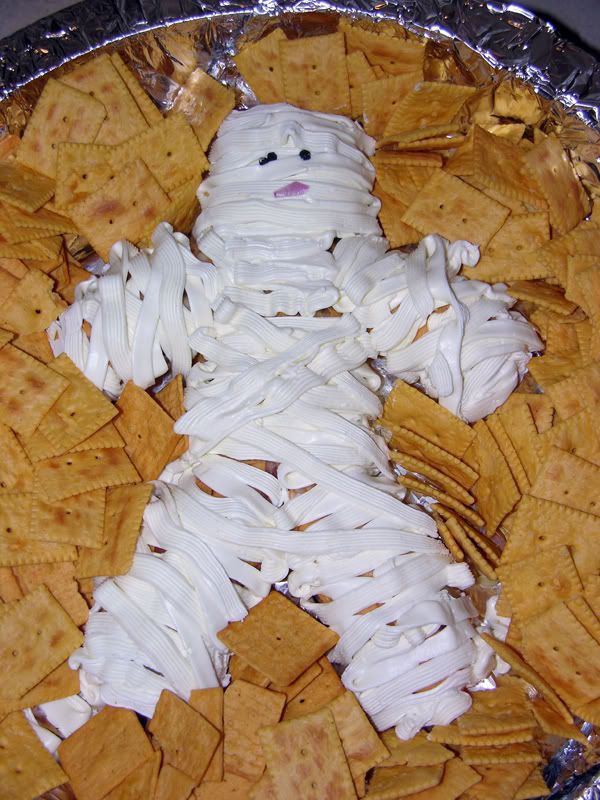
I did find an old mummy cheese log surrounded by crackers that I had made for a church event. You can make any recipe cheese log you’d like. Pre-made and purchased worked great for me. Just make a savory cream cheese based dip, fill your piping tube and mummify the orange cheese. Olives for “eyes” and other veggie accoutrements work great, too. Use your imagination!


One of my favorite magazines for a Mom with and a home based business is Working Mother. I no longer subscribe but they have the best time-saving tips, recipes, etc. I think every Mom should read it – just to save time (isn’t every mother strapped for time?). I don’t think I got this costume idea from there, but…one of the easiest, cheapest and cutest costume ideas I’ve ever seen was this mummy – this was Jack in 2006. So very scary. Ah, the memories…they are growing too quickly for sure!

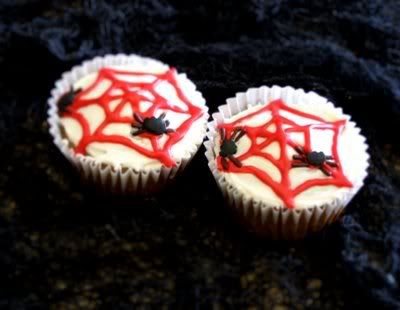
Kara’s Cupcakes – Halloween Ideas

I was out to lunch yesterday with a friend and we stopped by the bookstore to look at some quilting and knitting and design books and she said, “What is up with cupcakes? They are everywhere these days!” and I’m not sure what I replied but I wholeheartedly agree. They are everywhere – and for good reason. It’s the perfect little sugar package.

Fast forward to this morning, I open my email and another friend, Kara, has started a new blog. Kara is the sweetest (and one of the prettiest) girls you’ll ever know. It makes complete sense that everything she makes is ultra sweet and adorable. She had more talent in her pinky toe when we met (she was 10 and I was 20) and she still could teach me a few things. Anyway – her new blog is all about cupcakes and I wanted to share her beautiful creations with you! There’s some adorable Halloween ideas here. I made the mummy cupcakes a couple of years ago – I’ll see if I can’t dig out a picture of my own from way back when!

Another Beautiful Set of Cupcakes…

Another adorable blog that is one part sugar, one part presentation is Amy Atlas. I do not personally know her but wish I did!

My Favorite Breakfast – Oat Bran!

I am addicted to oat bran. I know, crazy. It is fast, easy and yummy and I’ll let you in on my secrets. Get a big bowl. Put it away and get a bigger bowl. This way you can cook it in the microwave. If you want raisins, put them in now. Other additions are better after it’s cooked (say, nuts, fresh fruit or maple syrup). Place 1/2 c. uncooked oat bran in the bowl with 1 c. water. I usually go shy on the water so my oat bran is fairly lumpy and soaks up the milk I like to put on top (no porridge or gruel for me – it should have some substance to it!). Microwave on high for 2 minutes. Use a saucer for a lid. Stir and microwave in additional 20 second increments until it is the consistency that you like. Add 1 tsp. butter, cinnamon (if desired) and about 2 oz milk on top. I sweeten mine with Stevia (2 packets) but you can use real sugar if you like. There’s so many carbs in the oat bran, though, that real sugar makes it too sweet for me. A couple of variations you might like: mix in a hot cocoa packet (regular or no sugar) – yummy! I also occasionally like mixing in 2 heaping tsp. Green & Black’s Organic Unsweetened Cocoa. When I do this, though, I usually add a little Splenda to taste. Very nice chocolate fix. Maple syrup is also a good addition with bananas and yogurt…there are so many variations that I could eat this every day!

What I Designed Today: Photoshop Family Silhouettes “How-To”

Jack Silhouette

A few of you asked how to create family silhouettes in Photoshop. I’m sure there’s a zillion ways but here’s how I did it.

Step 1: Take the digital photo.
Stand each family member, sideways, against a blank wall. It would make it so much easier if you had a really white, plain wall with no shadows (i.e. no flash if you can manage it).

Step 2: Get it on your computer.
Transfer the photo to your hard drive (remember where). If you don’t know how to get a file onto your computer, please, just stop now. Just teasing – just email me and I’ll try to help! Open the file using Photoshop or another photo editing tool. This how-to will be using Photoshop CS2. Be sure to save your work as you’re going along!

Step 3: Make your selection.
Using the magnetic lasso tool, make a single click at the bottom left edge of the person. This is your starting point. Continue to make single clicks to help guide the magnetic lasso where you’d like it (if it places a node where you don’t want it, just hit the delete key and it removes the last node). Continue single clicking and following the outline as close as you can around the top and back down the right hand side. Once you get to the bottom on the right hand side of the silhouette, double click and the loop will automatically close. Alternatively, you can manually hover over the original click on the LH side and you’ll see a small circle appear indicating you are closing the loop. If you accidentally clicked elsewhere or “lost” the marching ants, no fear – just hit CTRL+D to deselect everything and start over with the magnetic lasso.

Step 4: Edit your selection.
There are a few options for editing your selection. While the marching ants (dotted lines) are activated, you can choose modify and smooth on your drop down menus. Or, you can use the circle or marquee square tool (while holding down shift) to enclose additional portions that you wanted to select. If you want to SUBTRACT portions, hold down the ALT key while you make the marquee and it will subtract those portions. My favorite way is to use the polygonal lasso tool while pressing CTRL and click to curve out a pony tail or any other feature I want – just click away in the approximate shape you want and be sure to double click to close the shape.

Step 5: Once you have the outline or silhouette selected how you’d like, fill in that area with black from the drop down menus (Edit / Fill / Black), or Shift F5 brings up the same menu.

Before clicking anywhere else and while the marching ants are still there, choose Select / Inverse from the drop down menus. Now click Edit / Fill / White (you can also just Edit / Clear if you are on a white background but Edit / Fill / White works every time).

Step 6: Touch up with the air brush or eraser or however you’d like. This is where I remove double chins and stray hairs (and stray hairs on double chins, just kidding)! It’s easy to add hair flips and pony tails, also, with the shape/pen tool (the one that looks like a fountain pen tip).

Print on a laser printer or alter proportionately to fit the final size dimensions you are looking to create by using the Image Size and Canvas Size options. Be sure to do this proportionally. Save your file as a grayscale tif or, if you prefer, convert to a bitmap (very small file size).

Email me at liz@sparkbark.com if you have any questions or need any help with this – it’s really fun to do on an annual basis to see how everyone changes over the years. Be sure to email me your best silhouettes – I’d love to see it if someone took the time to do their pet!
Apple Treats for Kids

HPIM2221.JPG

Yummy “candy” centered apple circles!

I have a bushel of apples so I’m getting good at thinking up treats for my kids. We exhausted the caramel apple dip recipe over the weekend and here is another.

HPIM2221.JPG

Mix 2 T. peanut butter with 1/4 c. uncooked rolled oats and about 1T. honey (or to taste).

HPIM2221.JPG

Core your apples and stuff ’em with the mixture.

HPIM2221.JPG

Slice into desired thickness and eat – it’s like having a “candy” center! My kids love this. I used my Pampered Chef Crinkle Cutter today but it’s absolutely not necessary – but cute.

Mary Engelbreit’s Recipe Contest

Photobucket

Pull out your best recipes, girls (and I know you have ’em). Link to the ME site and cook away! I’m sure it will be a great cookbook but it would be even better with a recipe in there from someone I know.

Raw Milk from Branched Oak Farm

boakcows.JPG

HPIM2221.JPG

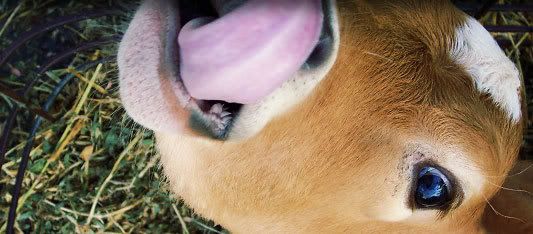
Lovely little farm. I drove quite a ways on dirt roads this morning to outside of Lincoln to find it. Legally they cannot advertise their sale of raw milk in traditional ways but I’m assuming it’s okay to critique the milk we just bought from them on our blog — it’s like drinking the best ice cream you’ve ever had. I have been reading up on milk issues (pro and con) for awhile now and have always wanted to try raw milk. We are loving it. This particular little farm has grass fed jersey cows and the milk is organic and not destined for big milk producers. Very clean, very good milk. If you want more information on raw milk, please visit realmilk.org. Yes, yes, we have read the warnings and studied up on the subject. I certainly wouldn’t get raw milk from a farm producing for a big dairy but I have to say, we absolutely love this milk! I picked up some kefir starter (my kids love this!) and grass fed beef there, too, this morning so I’ll have to let you know how it is later but I’m hoping spectacular.

Kids & Stealth Vegetables

Feeding vegetables to your kids a challenge? Me, too. Fortunately my kids enjoy one or two vegetables without a fight – if only each kid enjoyed the same ones so that none would go to waste! There has been much talk in the media lately about “stealth vegetables,” i.e. hiding veggies in your kids food. This sounds ingenious but also sounds like too much work to me. I really loved this article from Wondertime. Very, very good read. Read it here. Enjoy! Take THAT, Mrs. Seinfeld!

Cheap & Easy Chicken Thighs

Fabulous recipe. Must share. My kids loved it, too.

EASY BAKED CHICKEN

Ingredients:
1/4 c dry bread crumbs (we used panko)
1 tsp salt
1 tsp ground cumin
1 tsp paprika
1 tsp chili powder
1 tsp curry powder
1/4 tsp pepper
8 chicken thighs, skin removed (we didn’t remove the skin and it was really, really good!)

Place all ingredients in a large resealable bag and shake it all up thoroughly. Place on baking sheet coated with cooking spray. Bake, uncovered in a 400 degree oven for about 20 minutes. Turn chicken pieces and bake 20 to 25 minutes longer.

Hope you enjoy it as much as we did!